
Once a week from now on, I'm going to give myself a challenge to complete in a day. Whether it be visualisation focused like this, modelling challenges, texturing or any aspect of 3D I want to focus my skills on, I'll be posting it here. This week I had a look into subsurface scattering with VRay inside 3DS Max.
Now I have set myself free from the (unsupported and outdated) grasps of Lightwave. I've taken on the task of re-familiarising myself with my old friend, Max.
The last time I used 3DS Max was about 3 years ago and I thought that after I opened it back up again it'd be like jumping right back onto the bike. I quickly found how far from this simile I was. And it felt more like jumping back on the bike if the bike was a space ship.
I digress.
I've been doing a bit of modelling in Max to cover that aspect of 3D but I realised when it came to using VRay again, my skills were still rusty. Hence this challenge. Hence this raspberry.
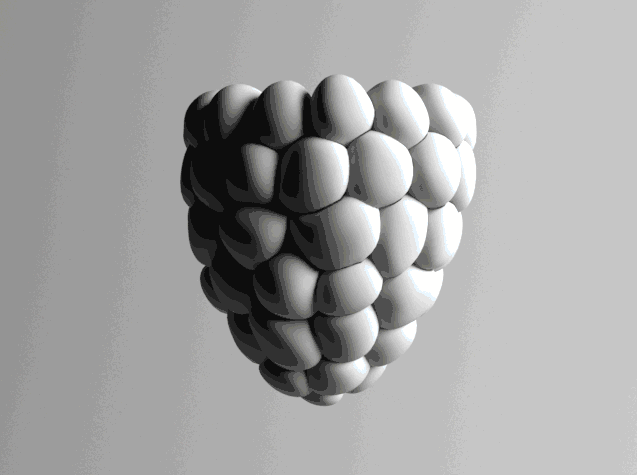
Now before I get ahead of myself, lets take it back to the start of this project when I opened up a program called ZBrush and arrayed a bunch of spheres.

Step one: The modelling for this was fairly simple. First I drew a sphere and used the move tool to deform it into a sort of 'seed' shape. This was the main component of the model, surprisingly. Then, by using my advanced techniques of 3D modelling brought on by years of training and experience - I duplicated and rotated it by an offset pivot.
Thus creating this wonderful spiral effect.
The rest of the model was more or less a repeat of this. Each time as the 'seeds' were moving closer towards the origin there would be fewer and fewer to fit in the space. I made sure to not be too precise with my placings as it would look too perfect. Fortunately for me, I'm a terrible artist and these things come naturally.

After all the 'seeds' were in their places, it was time to add a little bit of detail and some more randomness to them. I made some larger than others and used the move tool to displace them. As balls don't tessellate particularly well, I was using the inflate tool to blow them up and then smoothing them down from the centre outwards. I found this worked quite well as it didn't make them look too blown up and the edges met in a snug fit.
After I spent a good 6 years doing that to each seed, it was time to prep the model to import into Max. With these all being different subtools, I had to merge them all so they would import as a single mesh. But before that I had to use the ZRemesher feature, native to Zbrush 4.whatever, to reduce each seed down to a manageable polycount. 500 polys each seemed to look good. There was no baking or normal mapping so this would work fine.
Now we have this fine piece of craftsmanship imported into Max, I then had to set up the scene. I used a typical curved floorbowl behind the subject lit it with fill light (from the right) and a small key light (from the left). Result was as follows.


Colour. Using the SubSurface Scattering shader in VRay was surprisingly a lot easier than I first anticipated. To get a basic result all you really had to do was apply the shader to the object, change the colour and hit Render. I could have sat there for days just tweaking the scatter colour, scatter radius and scale.
I found that the scatter radius worked in strange, inexplicable ways. It seemed to work on a normal linear scale between 0 and 1 but after that it had no effect unless you really ramped up the values. 400 worked for me and seemed to let the right amount of light through. This worked up until about 450 where the raspberry would just go nuclear with the amount of light let through.
I pretended to know what I was doing and moved onto the Specular layer.
I had a bit of a breakthrough with this. Not shown in the image to the right, but what I actually done was fed a turbulent map through this to break up the glossiness. This worked like a charm and give me the exact effect I was after. I set the high value to some light grey and changed the low value to just off black. This way I wouldn't get the extremes of each value through. No mirror-berry for me.
You can see that my only use of colour in this was the 'Overall Color'. If I had any more time to run a few more tests and really figure out how to get good differentials in the scattering colour, I would have. I played around with the 'sub-surface color' and the 'scatter color' a bit but kept the values to greyscale only. All they seemed to do is lighten and darken the overall value.
Hooray, the colour was done. Now bear with me, we got two more things to go. But I'll make them quick. I promise. Probably.

Now there is probably a correct, scientific name for these twirly seed things that sprout out from between the juicy parts. But apart from sounding like a description my ex girlfriend once give me, I'm just going to call them 'sprouts'.
I made 3 variations of these. But to make them I just extruded the top poly of a cylinder through a spline and added a little bulge on the end. It didn't take too long and with them being so small there wasn't much detail to add to them.
Colouring them was a little trickier though, but I found a way. After applying the standard VRayMtl shader I then fed a gradient through the diffuse.
See Image on my left.
It wasn't perfect by any means but I manged to make something work. First things first, I needed the gradient to work following the local axis of the sprout. Thanks to randomly clicking things and seeing what works, which is ironically half of 3D design, I got the result I was looking for. I used completely contrasting colours at first so I knew which direction it was facing and then after that it was just a bit of fine tuning and matching the colours with the ones from reference.
The final thing to add now was fur. This was another thing I thought would take quite a while to figure out but it turned out to be one of the quickest. Click an object, click VRayFur, add material, change length and thickness. I'm sure if you wanted to go deeper with it there are more advanced options as you scrolled down but I just wanted something rather basic.
After some final changes in lighting and a contrasting coloured backdrop to make the reds pop. This is my final result.


